To open Invoice Scheduler, click Scheduler > Invoice Scheduler.
There are two panels:
- A center panel which displays existing tasks along with a "+" icon to create a task.
- A right panel which displays a list of (invoiced) services grouped by employee.
You can create one-time tasks or schedule recurring Invoice Tasks. One-time tasks will send the invoice once on the date selected when creating the task. A recurring task will continue to send invoices on the selected date (monthly or weekly).
Late invoice load
If the scheduled date passes, and the invoices are not loaded (i.e. provider is late), the Send Invoice will still send the notification to your employees, but show the previous month's data.
There is no way to stop the send invoice for a particular month, asides from deleting the task.
Note: You cannot stop a scheduled invoice from sending. You can delete the task, but there is no process to “stop” scheduled report or a scheduled send invoice.
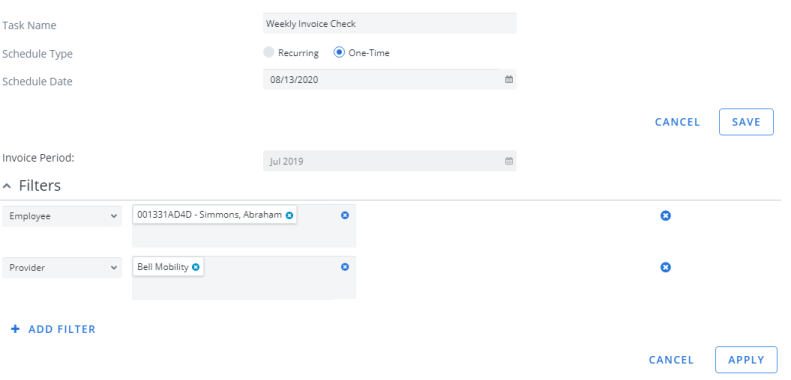
Create a one-time invoice scheduling task:
- Click on + New Task.A black record opens.
- Enter a Task Name.
- For Schedule Type, select One-Time.
-
Select a Schedule Date.
Note: You must select a future date. Do not schedule your task to run "today" as tasks run overnight.
- Select an Invoice Period.
- Click + Add Filter. A dropdown menu appears.
- Select a filter (Employee, Department, Provider, etc.)
-
Add filter terms in the text or search box.
- Repeat steps 6-8 until you have applied all your needed filters.
- Click Apply.
- Click Save. Your task is scheduled
Note: Tasks must have unique names. If you create a task with a name that is already in the Cimpl database, Cimpl will block your task creation and require a different name.
Create recurring Invoice Scheduler task
- Click + New Task. A blank task record opens.
- Enter a Task Name.
Note: Tasks must have unique names. If you create a task with a name that is already in the Cimpl database, Cimpl will block your task creation and require a different name.
- For Schedule Type, select Recurring.
- Select Start Date.
-
For Frequency, select Monthly or Weekly.
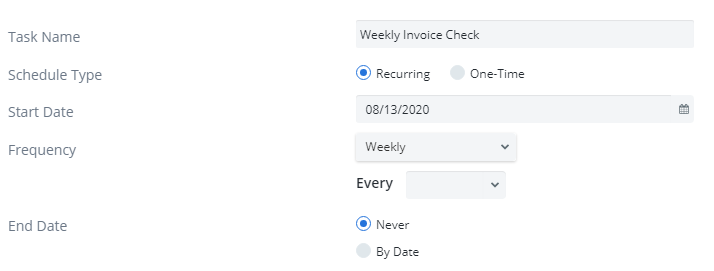
- Select the Day of the Month or the Day of the Week.
- Select End Date.
- Click + Add Filter. A drop down menu appears.
- Select a filter (Employee, Department, Provider, etc.)
- Add filter terms in the text or search box or select the option.
- Repeat steps 9-11 until you have applied all your needed filters.
- Click Apply.
- Click Save. Your task is scheduled.
Note: Cimpl does not allow any date earlier than the one indicated on your system (the time of your active session).